Tag Archives: holiday

Let the Decorating Begin

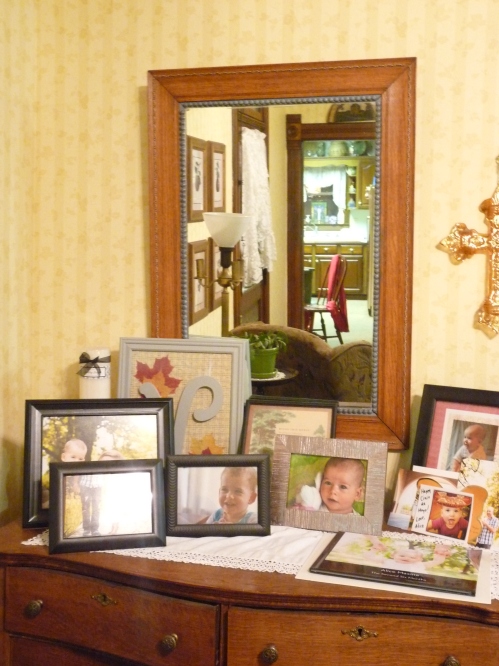
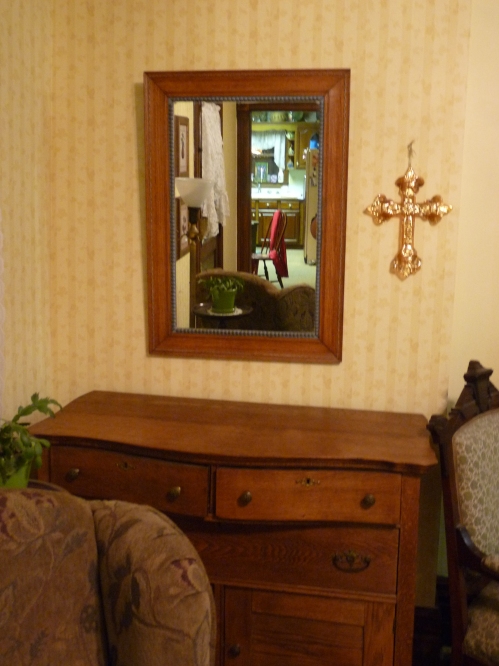
I love Christmas. I love the music, the decorations, the time with family, everything. Over the years I have started to do quite a bit of the decorating at our house and got a start on it this past weekend. We have a lot of options for decorations and not enough space for everything so the house looks different every year which I think is fun. This year I decided that the buffet would be one area that was done up completely different than it had been before.

Gold 007

Gold 012

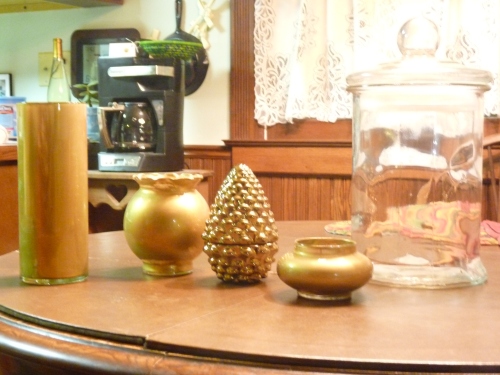
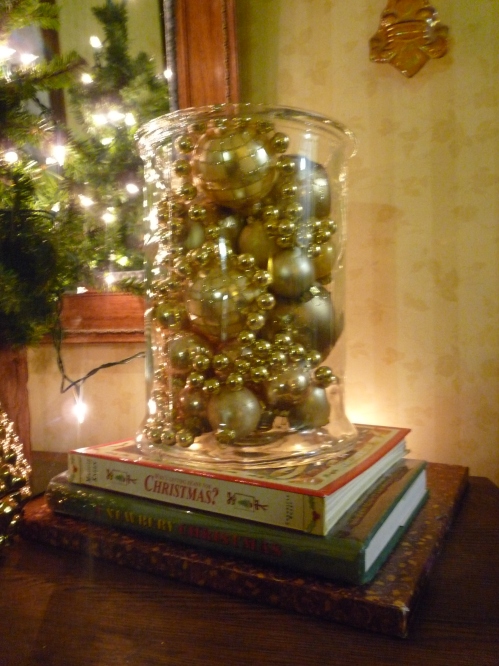
This fall I made some faux enamel vases and I decided it would be nice to include those in my buffet arrangement. I have also always loved the look of ornaments piled up in a glass cylinder and we conveniently had a selection to choose from out in the garage!

Gold 001

Now that I had some height to work with I started to search through the boxes to find some gold ornaments to use. I quickly found the box of gold and got to work filling the container with godliness. There isn’t really any rhyme or reason to the way that I placed the ornaments, I just put in a few and then moved them around until I liked how they looked.

Gold 021

Next I found some red berries that I thought would bring a little brightness to the arrangement of gold, we have used these before on our trees, but this year they were getting a new use.

Gold 018

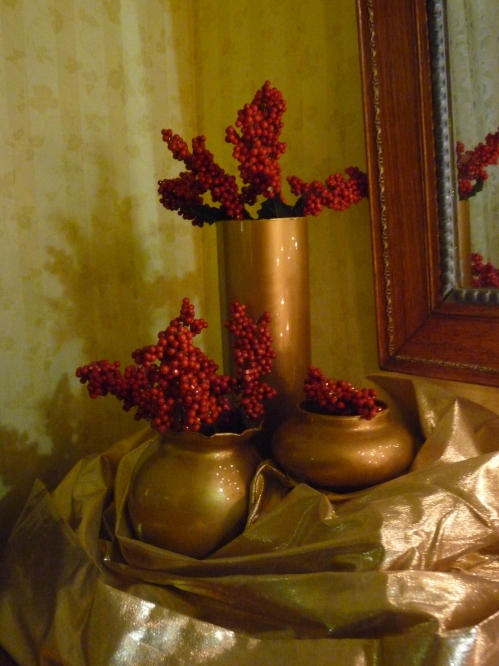
I used a couple of boxes to lift up the smallest vase so it didn’t get hidden in the gold fabric I chose to use to add some texture and shine to the buffet.

With three vases on the left and one large container of ornaments on the right I knew I needed something with a little more height in the middle to balance things out. I went back out to the garage to see what we had in the artificial tree department and I was in luck! We had a perfectly sized tree, about 2 feet tall and narrow enough to fit nicely in the space I had left.

The only item that I purchased new for this display was the gold pinecone candle. I saw it at Target when I was wandering through last week and I knew I had to have it, and an added bonus is the candle actually smells good!

Gold 019

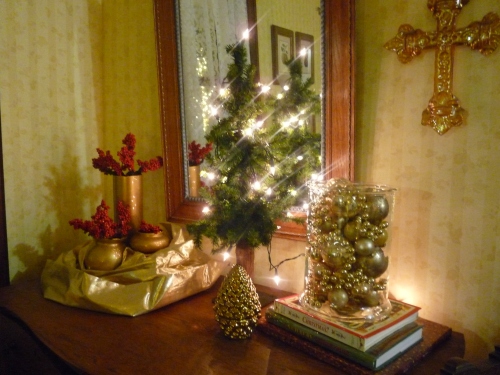
I am really happy how the buffet turned out. Something different but almost everything was already in our Christmas stash. I continued my decorating binge and have things just about finished.  The only thing we need is our REAL tree.  Maybe this weekend we can trek out to the tree farm and pick out the perfect, narrow, but tall (if we want it to be) tree!

-Emily

It’s Turkey Time!

In honor of the main protein served this month I thought of a quick and easy craft project. This fingerprint turkey idea was really simple and could be done with kids of any age. As with my thankful wheel project these were completed by the cousins, ages 5, 8 and 11.  They all had fun and all completed these without any assistance.

The supplies were again things I just had around: card stock, stamp pads and a few markers. The only thing we needed was our finger prints.


Using the brown stamp pad we used our thumbs for the body of the turkey and our index fingers for the head. After that we used a variety of colors to make the feathers. I decided that we didn’t have to use all realistic colors for this project.  After all,  it was just for fun.


To help keep things neat I asked that the girls use one color for each row of feathers, but other than that they were off to the races. Valerie worked very quickly and requested permission to make a second turkey, Stephanie finished next and wanted make another on a separate piece of paper, and Lexa was the last to finish.  She worked very carefully, and wanted very boldly colored feathers.

The final step was to use a few markers to add the legs, beak, “gobbler”, as I like to call it, and an eye. Theses were the “required” elements on the turkey, just to help the final project look turkey-esque. They decided to give a few more embellishments for fun.  Might as well keep it fun, after all, what is life without a little whimsy?

-Emily

Editors note from sister Eliina – Like poulty and whimsy?  Then you must love this classic post by the Bloggess.

Being Thankful

I’ve always loved holiday crafts.  I think it’s the teacher in me.  What is a holiday at school without a craft to go along with it, right? Well, now that I am not teaching, I have to get out that need for craft somehow and this holiday idea was graciously completed by my three young cousins. Whenever I babysit these cousins I like to have a project or game up my sleeve to keep things fun and they are always up for whatever I have planned. This past Friday night I had my crafty hat on for my time with the ladies.

For the first project, we created framed paper wheels kind of reminiscent of pies that spin to reveal what the girls are thankful for.  This idea was pretty easy to execute.  I had to help my kindergarten aged cousin with some of the cutting but other than that she was able to complete it by herself.

The supplies were all things I had on hand from previous projects: patterned scrapbook paper,card stock in several colors and small brads (paper craft fasteners).  I also brought along a set of alphabet stamps and stamp pads in a variety of colors.

The project requires paper circles of two different sizes, and I used a bowl and a salad plate at home to make a template for the girls to use.  The girls quickly got to work with their tracing.  They needed to cut out two small circles from solid card stock in contrasting colors. We cut a pie shaped wedge from the small circle that would eventually be on top.  Then they used the larger circle template to cut a circular hole in the patterned paper they chose as the frame for the project.

After all of the pieces were cut out it was time to stamp. I let the girls pick out a stamp color that coordinated with their paper color. Lexa decided to alternate upper and lower case letters, Valerie chose to use two different colors and then Stephanie went with all capital letters and one color, like the sample I had made for them.

The trickiest part of this project is finding the center point of each piece so they would line up once assembled. I did this by gently creasing one of the smaller circles in half and then in half again to create a center point. After finding the center point on one piece I lined up the rest of the circles and punched a hole through each piece.

Now for the final assembly!  Take a full sheet of patterned paper and secure it to a sheet of plain card stock of the same size using double sided tape.  Use a pattern that coordinates with the paper chosen for the frame.  Next, secure the outer frame on top of the full sheet of patterned paper using more double sided tape.  Then center the two contrasting small circles in the center of the frame space, and attach the circles to the larger sheet of paper using a brad.  Flatten the brad to secure the circles.

Once the assembly was done the girls took some time to write on the bottom circle what they were thankful for.  When the top circle is rotated, the things they are thankful for are revealed one by one.  Valerie, who is in Kindergarten and attends Catholic school, chose to be thankful for all of the Fruits of the Spirit and her family. Lexa and Stephanie chose a variety of things to be thankful for. Though they all had the same templates to work with the final products were unique to each of them.

Stay tuned for the other Thanksgiving project idea!

Halloween Mobile

Shame on me for posting this way late, but my main audience (Emily) doesn’t mind.  I posted about my leaf mobile a few weeks ago.  Using the same base, I changed things up for Halloween.  Using some paper foil spiders and a skeleton garland from a dollar store, I made a spooky mobile to hang over our Halloween centerpiece.

I cut the garland apart, leaving each skeleton hanging from a length of twine.  I punched holes in the spiders with a needle and strung most of them in groups of two or three.

It was a fun and easy way to decorate for the holiday.

-Eliina

Monogram pumpkin

I’ve never decorated our condo for Halloween, but with a toddler in the house I’m getting into the spirit this year. My daughter, whose name begins with the letter A, loves to point at this monogrammed pumpkin during meals.

I purchased this white plastic pumpkin at Jo-Ann’s, but I’ve seen similar pumpkins at Target and other stores.  This would also work with a real pumpkin.  Choosing the flattest side of the pumpkin, I lightly sketched the outline of a letter A using a pencil.  Then, using a Sharpie, I filled in the outline with dots of various sizes.  I made the larger dots first, then filled in with the small ones.  I then erased the pencil marks, leaving only the dots.  Enjoy!

-Eliina